Activity Time: Understanding Verb Tenses

Verb Tenses with Shurley English.jpg

Did you know that a verb can tell time?  It’s true!  Within every verb is a little piece of information called tense. The tense of the verb tells you when the action of the verb takes place. Mastering the use of correct verb tense is a critical skill that allows a speaker or writer to purposefully convey “time.” 

Do some of your students struggle to understand the difference between simple present, past, and future tense verbs?  If so, Shurley English has an activity that just might help them comprehend verb tense with more clarity!  Follow along, and I’ll show you how it’s done!

1. Give students a paragraph that is written in present tense:

Present Tense Verbs with Shurley English.png

2. Have students identify all the verbs in the paragraph by highlighting or underlining them:

Present Tense Verbs II with Shurley English.png

3. Next, ask students to write the verbs in order on a separate sheet of paper and verify that they are written in present-tense:

Verbs 1 with SHurley English.png

4. During the next step, ask students to change the present-tense verbs to past-tense.  

Tip:  If you want to change a present-tense paragraph to a past-tense paragraph, you must change each verb to past-tense, one at a time.  Example:

Verbs 2 with Shurley English.png

5. Finally, have students rewrite the original paragraph, inserting the past tense verbs in place of the present tense verbs:

Past Tense Verbs with Shurley English.png

This activity purposely focuses students’ attention on the tense of each verb in the passage.  It teaches students to use consistent tense to show actions that occur at the same time.  If they want to change a present-tense paragraph to a past-tense paragraph, students learn that all they have to do is change each verb to past tense, one at a time!   

Comment /Source

Cindy Goeden

Cindy Goeden has enjoyed being involved with Shurley English for the last sixteen of her twenty-six years in the field of education.  Working with various levels of students in elementary, junior, and high schools, in both the private and public arenas, Cindy surely is thankful for the providential day that she was introduced to Shurley English, which changed forever her approach to Language Arts instruction. That has led to her current job of having the joy of sharing about Shurley with other educators.  Her love of learning has prodded her to earn over two hundred and twenty hours, which includes two bachelor degrees in education.


Cindy currently lives with her husband, Donald, in Indianapolis, Indiana, where she enjoys puttering in her flowers, changing up her décor with the seasons, and occasionally getting out and traveling with Donald to either explore a new beach or view historic sights and gardens.

Back-to-School Planning: Educational Posters with Purpose

Posters in the Classroom with Shurley English.jpg

Although summer is in full swing, we all know that August is just around the corner and school will begin soon thereafter!  I feel like a killjoy for bringing this up, but I know from experience that now is a great time to work on a few of those back to school to-dos!  Instead of waiting until the last minute, why not check a few of them off the list? This week, I would like to focus on selecting and positioning Shurley English Jingle Posters in your classroom!  

Shurley English Jingle Posters are available to purchase.  They are 17” x 22” each and provide a colorful visual aid to assist students’ learning.  The posters are great tools for reinforcing grammar concepts taught using the curriculum, especially when they are displayed properly.  Your students can join the lovable Quigley character as he escorts them through the adventures of grammar if you choose to buy the posters!

Another option is to create your own Shurley English Jingle Posters.  Since Jingles are located in the Quick Reference section of the teacher’s manual or student book, all you have to do is copy them into your own design and VIOLA!  Ideas for how to create your own posters are endless, so if you have a theme in your classroom, use it. 

Shurley English Poster Set.png

Keep in mind that educational posters should be well-designed, well-organized, legible, and attractive.  They should be positioned in a spot that will be visible to every student in your classroom.  In order to promote learning and serve as an effective teaching tool, each poster should contain the following characteristics. The posters should:

  1. motivate and inspire students to learn.
  2. stimulate interest in the topic.
  3. effectively illustrate a concept or skill.


Jingles are an essential element of Shurley English.  They not only teach and reinforce important skills and definitions; they help transition students’ brains into a ready-for-learning state of mind at the beginning of class.  Researchers report that the visual sense is responsible for 90% of brain stimulation and that vision and visual memory take up to two-thirds of the brain.  Those findings substantiate how educational posters can truly assist students’ learning.

It’s easy to get overwhelmed with items on your classroom to-do list, especially if you wait until the last minute.  So, get Shurley English Jingle Posters on your mind and either purchase them or start creating them.  Either way, they serve as an effective learning tool all year long! 

Comment /Source

Jamie Geneva

Jamie Geneva is the Senior National Consultant at Shurley Instructional Materials and is a seasoned subject matter expert in the realm of English Language Arts.  Her career with the company began during the days of the Shurley Method binder, which was pre-1st Edition, and has spanned across three decades.  Over the years, her various roles have included teacher, presenter, state representative, consultant, manager, and most recently, a Shurley English Digital Assistant.  You might not recognize her face, but her voice could certainly sound familar.  That’s because she’s recorded Jingles, Q&A Flow Sentences, and other Shurley English content for many, many years. 

Jamie and her husband, Garret, live in the foothills of eastern Oklahoma. She loves spending quality time with her family, traveling, reading, cooking, and staying connected on social media.

Ms. Geneva received her B.S. degree in Elementary Education and her M.Ed in Public School Administration from Northeastern State University in Tahlequah, OK. 

Sensory-Based Activities for Spelling

Sensory Play.jpg

As you approach the end of your instructional year, it’s time to pull out all the stops. It's a great time to reinforce the skills your students have learned throughout the year. Here are several cool ways to have some spelling fun:


Idea #1: Let Your Fingers Do the Learning

Tactile learners need extra stimulus through their sense of touch. No doubt, you have one or two in your bunch who learn best through touch. You can tap into their strengths by using shaving cream spread thinly on a large, solid, flat surface. Students can practice spelling basic phonemes in the shaving cream by drawing the letter symbols with their fingers in the thin shaving cream covering on the work surface. Sometimes, your kids may exhibit fine motor or gross motor issues—for instance, in their handwriting.


Idea #2: Piping Sounds and Words

Finally, for a completely edible and delicious way to review spelling strategies or phonics concepts, melt some chocolate chips and add a bit of paraffin wax to the mixture. Scoop some chocolate into plastic decorator bags or zip-lock baggies with a small hole cut out of one of the bottom corners. Announce a group of phonemes you want to review, or whole words to spell, and challenge the kids to “squeeze” out chocolate sounds and words onto wax paper. Refrigerate them after the review and enjoy eating them for a tasty and positive morsel of reinforcement!

Piping Sounds.jpg

By giving your students multiple sensory experiences with various mediums, such as shaving cream, you can review skills in a fun way and also help ease some of their frustration. Don't limit this activity to just sounds; you can have students spell out entire words, too. You can also turn this into a small-group activity and let students take turns.


Supplies Needed:

Shaving cream (foam, not gel)

Chocolate chips

Paraffin wax (the kind used in home canning)

Decorator bags or zip-lock baggies


You can always change-up the sensory activity by utilizing other materials. For example, consider using colored art sand or colored dusting sugar on a large, flat surface. Letting their fingers do the learning and the reviewing can stay with them for a lifetime if you play it up right.

Comment /Source

David Lutz

David, a former classroom teacher, administrator, and self-proclaimed grammar nut, considers the oddities of English vocabulary and grammar his playthings! He received his degrees in elementary education, teaching, and curriculum design from CMU in Fayette, MO, and the University of St. Mary, Leavenworth, KS, respectively. His career has been a colorful collage of experiences in education, ranging from Kindergarten to Adult education and parenting classes.


He and his wife, Marjorie, have been blessed with 30 years of marriage, three grown sons, a cherished daughter-in-law, and the smartest, cutest grandson on the planet! He’s worked for Shurley Instructional Materials, Inc., for over 11 years and loves to help students and their teachers learn to love language and language learning as much as he does.

Shurley English Centers for Your ELA Classroom

(This is part two of a two-part series on Language Arts Centers. If you missed part one, you can find it here.)

ELA Centers Part 2.jpg

Now that you’ve decided to create Shurley English Centers in your classroom and have solidified the details of my  7 Must Dos, let’s brainstorm some topics and activities that you might decide to include in your Shurley Centers!

Here are some possible center/station ideas to get you started:


  1. Listening/Video/Jingles

-Have groups practice some of the Shurley English Jingles that stump them. (Preposition Flow, Transition Words, Eight Parts of Speech)

-Allow groups to record a video of themselves performing their favorite Shurley English Jingle.

-Have the group listen to and view different videos from YouTube that show other classrooms practicing their Shurley English Jingles; see if this helps your class gain some new ideas for “jazzing up” their current jingles.


2. Question & Answer Flow Practice

-Create a sheet with a set of Practice Sentences on it. Place the sheet in a plastic protector. Allow group members to partner up to lead each other through the Q&A Flow; one person uses a dry erase maker to label the sentences as the other person recites the Q&A Flow. (Be sure to create several Practice Sentence sheets for this center.)


3.  Practice & Revised Sentences/Sentence Blueprints

- Have a pre-written sentence or two prepared as the Original Sentence for students to work from.  Ask them to use different Sentence Structure Strategies to revise the Original Sentence.  Be sure to have dictionaries and thesauruses available at the center.  Students can draw a picture of their Revised Sentence and can be expected to share it during the Wrap-Up if they’d like. 

-Vocabulary and Spelling activities can be incorporated into this center, as well.  Have students create a fill-in-the-blank worksheet. Each student can write sentences that use words from the Power Words list.  Students can exchange papers with their group members to become familiar seeing and using these new words.


4.  Writing

–Have a fishbowl of different fun, quick writing prompts ready for students to individually choose and write about.  Include specific writing requirements such as including compound and complex sentences, incorporating Power Words, including inverted word order sentences, using colors to circle different parts of speech or types of sentences, and following the Three-Point Paragraph organizational format, etc.

-Pull in a part of the Writing Process for students to work on.

-Allow students to record themselves reading their rough draft to help them revise a short writing piece.

-Use a Writing Across the Curriculum activity here…just get the materials ready and you’re all set!


5.  Silent Station

-It’s nice to have a quiet group or two. If possible, a Chapter Check-Up or Classroom Practice worksheet can be assigned here to be completed independently and graded.

-Reading and Literature Time are incorporated into the Shurley English curriculum, so don’t hesitate to include a reading passage, poem, or research time into this type of Learning Center.


6.  Teacher Station/Float

-I often placed myself at a center where I reviewed a tricky concept with students to make sure they received more individualized attention and differentiated instruction. 

-Float around and monitor each center from a distance.  This allows the students to experience a sense of freedom that can build autonomy, independence, and self-confidence…you are showing them that you trust them to be active self-managers.             


Remember, all instructions should be typed out at each center in order for each group to follow them independently, along with all necessary materials/supplies for each activity.


The Bottom Line-BE CREATIVE & HAVE FUN!!


Comment /Source

Kimberly Crady

Kimberly Crady is an adventurous woman with an immense love for life, learning, and teaching. After teaching in upper elementary classrooms for nearly 10 years, she joined the Shurley Team in 2005.  Kimberly has had the unique experience of teaching Shurley English lessons in all levels, Kindergarten-8th grade and training teachers across the United States.  Kimberly is a National Consultant and SEDA Teacher for Shurley Instructional Materials.


Kimberly’s passion for helping people and living a healthy lifestyle has led her to continue her education in the area of Health and Wellness.  She enjoys numerous outdoor activities from hiking and snowboarding in the Rocky Mountains to paddle boarding in the ocean; although, these days you can find her practicing hot yoga in a Bikram Yoga studio. She also enjoys traveling abroad, live music, reading, and spending time with her favorite mutt, Lu.  Kimberly’s experience as a Certified Health & Wellness Coach and Teen Life Coach helps support her firm belief in teaching the whole person, especially in the classroom.


How to Implement Successful Language Arts Centers

Shurley Centers.jpg

Anyone up for an out-of-the-box challenge?

When I was a classroom teacher in the 90’s some of us teachers were in the business of creating student-led learning centers or stations for Math, Science, or Language Arts.  I loved creating and hosting centers in my classroom because it gave my students the opportunity to collaborate in small groups, be a leader among their classmates, and learn subject material on a deeper level. 


You might be asking, “What is a Learning Center?” 

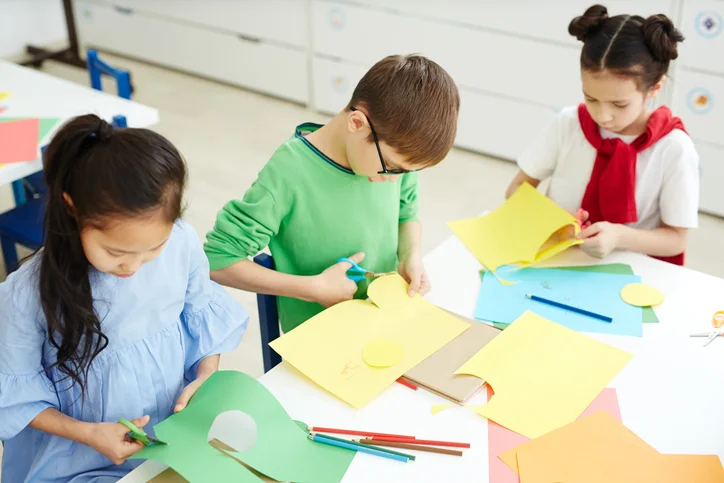
A Learning Center is typically a designated area in the classroom that provides students with experiences to practice, reteach, and enhance their learning.  Most Learning Centers are filled with creative, hands-on activities and the necessary materials to carry out those activities independently or in small groups.  Participating in Learning Centers requires students to take responsibility and accountability for their own learning.  Learning Centers give teachers the chance to truly teach to the different learning styles of their students-to differentiate instruction.

Creating centers was a bit time consuming, yes, but if you had all your ducks in a row the payoff felt very satisfying! If you are a multi-tasker with good time management skills, can be organized and prepared in advance, and are an effective classroom manager…you can pull it off!  As far as the classroom expectations or rules go, they don’t change and each center may have additional rules; your students are essentially responsible for themselves. You are the guide-by-the-side in this scenario!

WARNING: If you tend to get frustrated with a little bit of chaos or teach from a more scattered, fly-by-the-seat-of-your-pants approach, centers could end up being a stressful nightmare and may not be for you.


Characteristics of Effective Centers:

Remember, each center should be purposeful to the growth and academic progress of the student, not just busy work.  And, centers give YOU the opportunity to place yourself at one center to teach a small group, or you may choose to monitor your students by weaving your way through each center. Here are some important characteristics of effective centers, also known as, "M.E.A.P.S."

Multisensory-Create activities that appeal to all learning styles! See It, Hear It, Say It, Do It!

Engaging-Strive for 100% student participation!

Aligned-Content must support your current classroom instruction.

Purposeful-This should not be just a bunch of busy work; see your students in action & assess what you need to assess!

Student directed-Students should be able to follow the given directions without teacher assistance and be responsible and accountable for their own learning.


Let's Create a Center...the logistics!

Now, you're ready to begin creating centers, right?!? Let's consider these seven MUST DOs as you get started. 

  1. Decide on which subject material to focus.
  2. Decide how many Learning Centers to create. (Computer stations can count as one.)
  3. Where will the centers be located?
  4. Determine what you want your students to learn or be able to do through the activities.
  5. Calculate how much time is allowed at each center and decide if you’d like to keep the centers open on a weekly basis on a specific day for a certain number of weeks.
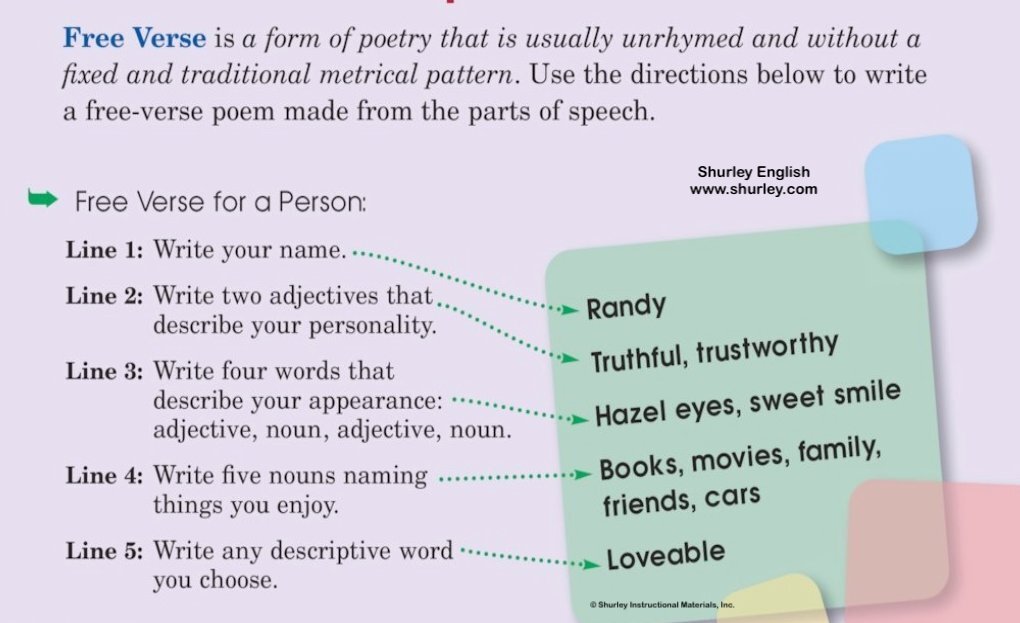
  6. Name each Learning Center.  Write a description of the center, instructions on what to do, and the task to complete.
  7. Be sure to review the expectations with your class before the centers officially open and close your Learning Centers with a Wrap-up Session or Take-Away Time.

I found it doable to have 4-6 students per group, depending on the number of centers I had created.  I was also able to devote up to two hours during my instructional time for centers, so my students would be in each center for 20 minutes.  Before the rotation began, I would give the group guidelines and expectations for each center so they could be totally engaged for the full 20 minutes.  At the end of the final rotation, I would bring the whole group back together for a “Wrap-Up” in order to bring the experience to a close.  It also worked to take two days to complete all the rotations in the Learning Center, but as you can imagine, it didn’t flow as well as taking a longer block in one day.  Opening up your Learning Centers on a weekly basis, on a specific day, works too…it will require a bit more organization and prep, but once students understand the process, it works nicely.

So, I invite you to think about it and decide if this, out-of-the-box challenge, is for you? If so, tune in to Part 2 where I’ll share some possible Shurley Learning Centers with you!


Comment /Source

Kimberly Crady

Kimberly Crady is an adventurous woman with an immense love for life, learning, and teaching. After teaching in upper elementary classrooms for nearly 10 years, she joined the Shurley Team in 2005.  Kimberly has had the unique experience of teaching Shurley English lessons in all levels, Kindergarten-8th grade and training teachers across the United States.  Kimberly is a National Consultant and SEDA Teacher for Shurley Instructional Materials.


Kimberly’s passion for helping people and living a healthy lifestyle has led her to continue her education in the area of Health and Wellness.  She enjoys numerous outdoor activities from hiking and snowboarding in the Rocky Mountains to paddle boarding in the ocean; although, these days you can find her practicing hot yoga in a Bikram Yoga studio. She also enjoys traveling abroad, live music, reading, and spending time with her favorite mutt, Lu.  Kimberly’s experience as a Certified Health & Wellness Coach and Teen Life Coach helps support her firm belief in teaching the whole person, especially in the classroom.


Flexibility: Is it a key ingredient in your classroom?

Flexibility: Is it a key ingredient in your classroom?

If you’re like most human beings in 2018, you probably spend a fair amount of time in front of a computer, tablet, or cell phone sitting, reading, texting, typing, or holding a phone up to your ear. Our workplaces and classrooms have been overtaken by the digital world. Even now, you are on your digital device reading this! So let me ask you a question…

Read More

Word Analysis Strategy: How to Convey Depth of Meaning

Word Analysis Strategy: How to Convey Depth of Meaning

For some people, writing is an arduous task. They would rather do anything but pay attention to and analyze words—especially when they are writing. But, it is possible to help writers learn how to analyze words in a fun way, intentionally, and with a goal in mind…being specific. Do you want your kids to write words that truly convey depth of meaning? Here’s one way to help them understand how.

Read More

Up Your Language Arts Game While on Vacation

Up Your Language Arts Game While on Vacation

My family and I have played a really cool game throughout our years together. My wife and I thought it up when we were traveling on vacation several years ago, and it remains as one of my all-time favorites (not sure anyone else agrees!!). It only requires a brain, a vocabulary, and a voice.

It’s a kind of free-word association game. It is loosely modeled around the psychological test called

Read More